Secrets Management - Managing Environment Variables with Direnv


Many of my tools, such as GitLab Watchman, are designed to find secrets hardcoded or added as files to code repositories. Handling secrets this way is a bad idea for a number of reasons, but the main issue is that it leaves them open to being exposed.
In this post, I’ll show you how to manage secrets more securely during software development using environment variables and direnv.
Approaches to Secrets Management
There are two best-practice approaches to managing secrets in application development:
Secret Vaults:
- Services like AWS Secrets Manager, Azure Key Vault or HashiCorp Vault, where you can store and retrieve secrets at runtime.
Environment Variables:
- Passing secrets to applications using locally defined variables
Secret vaults are good for complex production applications that are tied in to a particular provider, and use multiple services on that infrastructure (think of an app running in AWS, using ECS, Lambda etc.). Environment variables are far less complex, and are a more accessible solution for local application development.
About direnv
Direnv is a shell extension that allows you to load and unload environment variables from a file stored in the current directory.
This has benefits over other approaches to environment variable management:
- Unlike
dotenv(a similar solution) it will work with any programming language. - It works with all of the common shells:
bash,zsh,fishetc. - It hooks directly into the shell, not into a process. This means the variables loaded by
direnvare available for any process in a shell session.
direnv looks for an .envrc file in the current directory, or a parent directory, and loads environment variables from that file into the current shell (if authorised, more on that later.)
Installing direnv
Full installation instructions are in the documentation. Installation commands for the most common OSs are:
Ubuntu & other Debian based OSs:
apt install direnvmacOS (via Homebrew)
brew install direnvdirenv isn’t compatible with Windows natively, but is available using WSLOnce installed, you then need to hook direnv into the shell:
Bash
Add the following line at the end of the ~/.bashrc file:
eval "$(direnv hook bash)"It is recommended to have this right at the end, after any other shell extensions
ZSH:
Add the following line at the end of the ~/.zshrc file:
eval "$(direnv hook zsh)"Oh my zsh:
Add direnv to the plugins array in your zshrc file:
plugins**=(**... direnv**)**Using Direnv
Now we’ve got direnv installed, let’s see how it works. Navigate to a new directory and create a file called .envrc, inside this file, export an environment variable, in this example we’ve exported an API token:

Once we’ve created the file, we can see in the terminal an error from direnv:
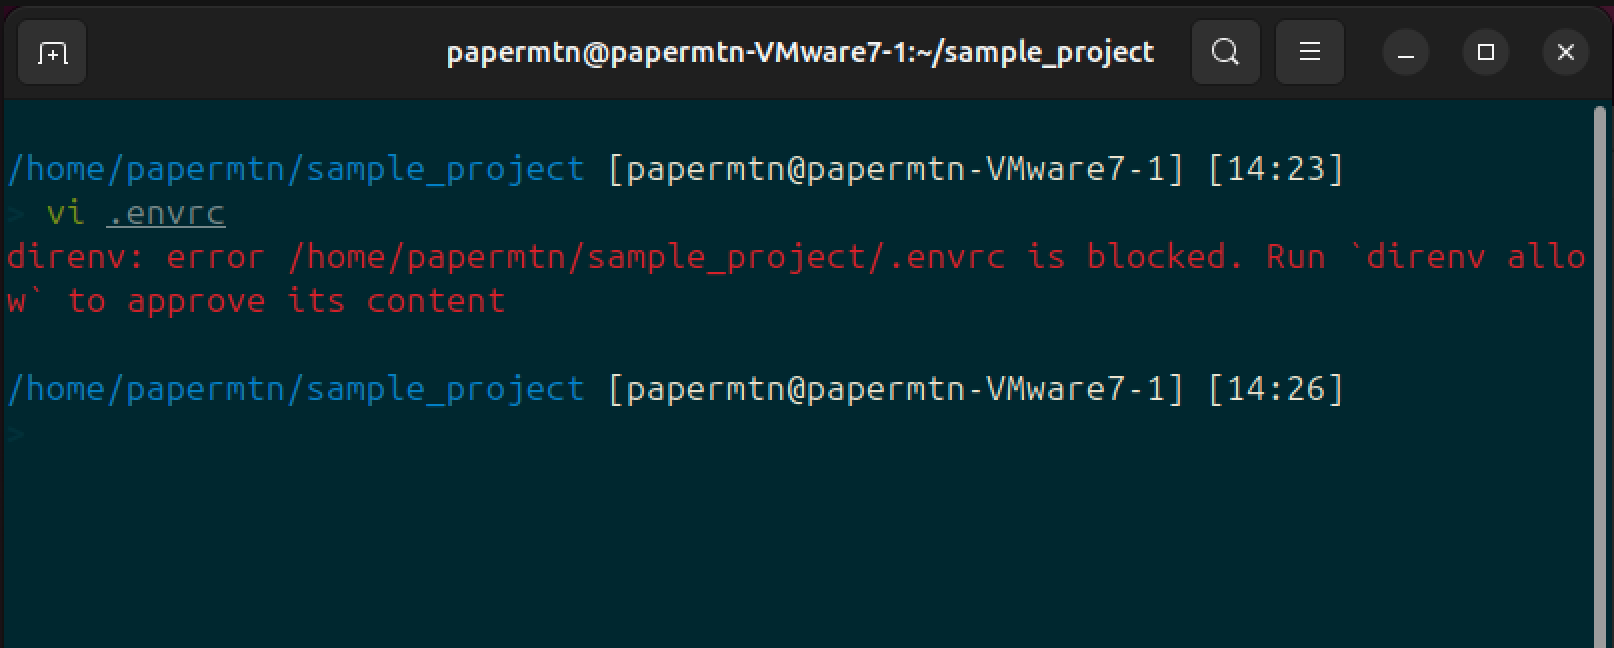
direnv: error /home/papermtn/sample_project/.envrc is blocked. Run direnv allow to approve its contentdirenv has security mechanisms in place to protect us from loading untrusted environment variables into our shell when we navigate into a directory that contains an .envrc file, as this could lead to running arbitrary code. When direnv detects a file that hasn’t been loaded before, you need to approve its use using:
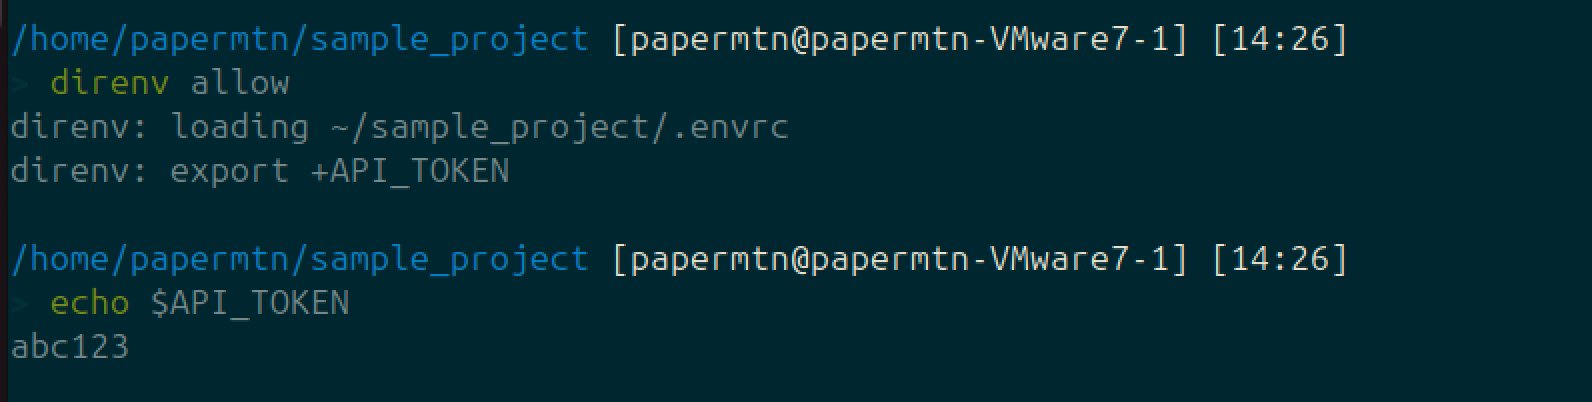
direnv allow.envrc file.Now the environment variable is loaded into your shell, and you’re able to access it:
When you navigate out of the directory that contains the .envrc file, the variables defined in that file are unloaded from your shell:

This means you only load and unload the environment variables you need in a specific project, and you are less likely to mistakenly pass them to other applications.
Now you have your secrets stored in environment variables, you can leverage these in your application, like in this small Python example:
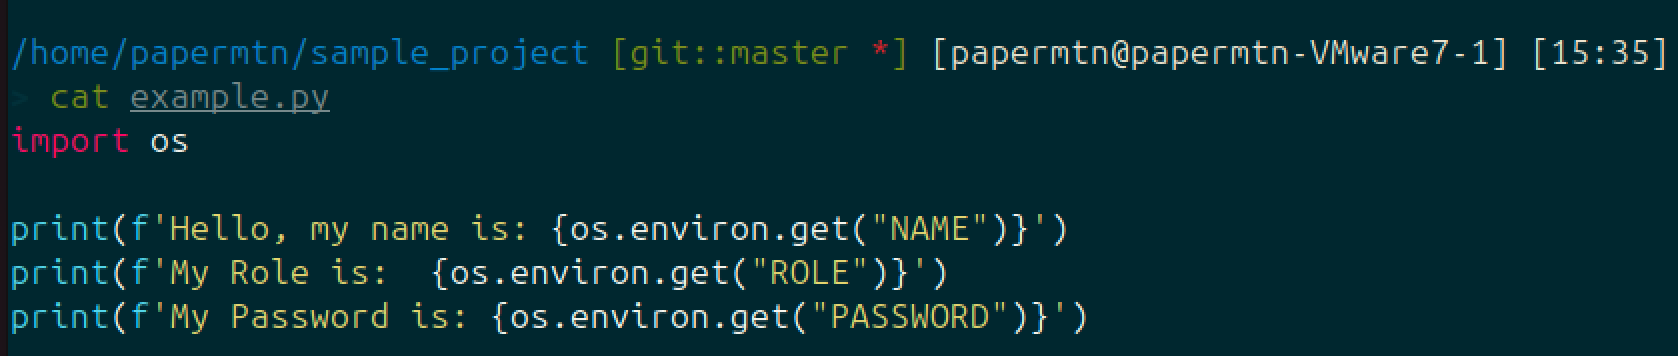
We’ve set our environment variables in the .envrc file. At runtime, Python can access and use these variables:
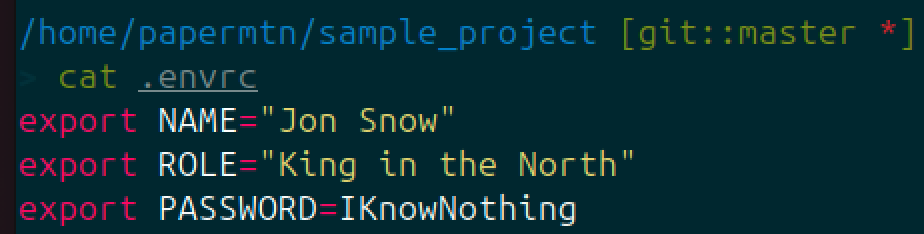

.envrc file before allowing it.If you haven't created it yourself, be sure to review the contents before running
direnv allow, since approving it will execute whatever commands it contains. This could be malware downloaders, commands that modify your shell settings, or potentially exfiltrating data.Important Final Step: Configuring a global .gitignore
We’ve successfully moved our secrets out of plaintext from our code repositories, which is great news. The thing is, we’ve moved all of these secrets into the .envrc file, which is sitting on our device. This is fine for development and running apps locally, but we want to be 100% sure that this file never leaves our device, and we definitely don’t want it to end up pushed to a code repository via Git.
The solution to this is to make sure that Git will ignore this file when pushing and pulling from a repository. We could make sure that .envrc is added to the .gitignore file for each project, but the safest option is to configure a global gitignore, to make sure that no .envrc files are committed via Git across any of our projects.
The first step is to create the file .gitignore in your home directory. Inside this file, add an entry for .envrc:
echo ".envrc" >> ~/.gitignoreNow its as simple as configuring git to use this file as the global exclusion file:
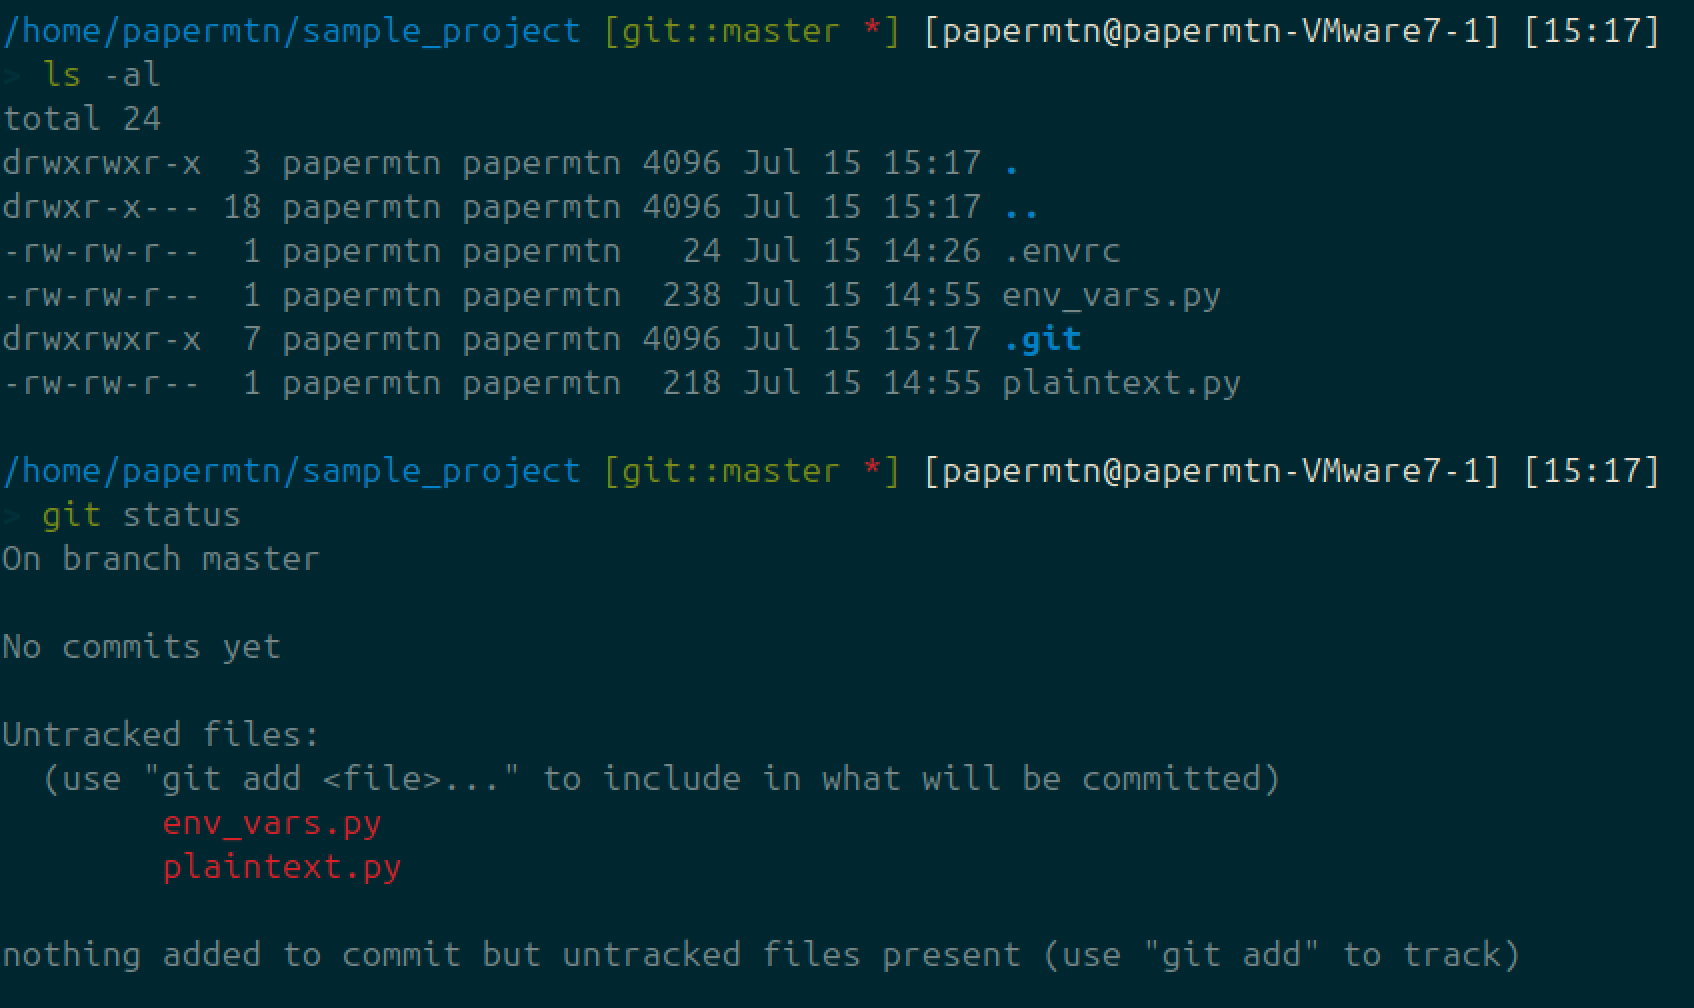
git config --global core.excludesfile ~/.gitignoreWe can now see that Git is ignoring the .envrc file in my directory using the global .gitignore.
Conclusion
You now know how to install and configure direnv, how to use it to store environment variables that will be loaded into your shell when you enter a project directory in an .envrc file, and how to leverage these environment variables in your scripts and applications.
You’ve also carried out the important step of configuring a global .gitignore to make sure .envrc files are not committed to your repositories (Right?…)
You’re now ready to head out into the world and handle secrets in your applications in a much more secure way.
And, in a shameless final plug, don’t forget you can use applications such as GitLab Watchman and Slack Watchman to find exposed secrets.


